
Ngày 28/09/2022, Cloudflare đã thông báo về phiên bản beta mở của Turnstile, một giải pháp thay thế vô hình cho CAPTCHA.
Bất kỳ ai, ở bất kỳ đâu trên Internet muốn thay thế CAPTCHA trên trang web của họ đều có thể gọi một API đơn giản mà không cần phải là khách hàng của Cloudflare hoặc gửi lưu lượng truy cập qua mạng toàn cầu của Cloudflare.
Không ích gì khi nhắc lại thực tế rằng CAPTCHA mang lại trải nghiệm tồi tệ cho người dùng, nó đã được thảo luận chi tiết trước đây trên blog này và vô số lần ở những nơi khác.
Người tạo ra CAPTCHA thậm chí còn công khai than thở rằng anh ta "đã vô tình tạo ra một hệ thống đang lãng phí các tài nguyên quý giá nhất".
Sau khi, chúng ta đã tìm hiểu vì sao Turnstile được ra đời, thì trong bài viết này mình sẽ hướng dẫn các bạn cách sử dụng Turnstile trong dự án Laravel của mình nha.
Khởi tạo dự án Laravel sử dụng Turnstile CAPTCHA
Đầu tiên, chúng ta cần tạo một dự án Laravel mới, sử dụng lệnh sau:
composer create-project --prefer-dist laravel/laravel laravel_turnstileBạn hãy sử dụng lệnh sau để khởi tạo một controller mới:
php artisan make:controller TurnstileControllerSau khi TurnstileController được khởi tạo, bạn hãy mở và chỉnh sửa như sau:
<?php

namespace App\Http\Controllers;

use Illuminate\Http\Request;

class TurnstileController extends Controller
{
    /**
     * Store a newly created resource in storage.
     *
     * @param  \Illuminate\Http\Request  $request
     * @return \Illuminate\Http\Response
     */
    public function store(Request $request)
    {
        $validated = $request->validate([
            'name'     => 'required|max:255',
            'email'    => 'required|max:255',
            'password' => 'required|max:255',
        ]);
        //
    }
}
Tiếp theo, bạn hãy mở web.php nằm trong thư mục routes và chỉnh sửa như sau:
<?php

use Illuminate\Support\Facades\Route;
use App\Http\Controllers\TurnstileController;

/*
|--------------------------------------------------------------------------
| Web Routes
|--------------------------------------------------------------------------
|
| Here is where you can register web routes for your application. These
| routes are loaded by the RouteServiceProvider within a group which
| contains the "web" middleware group. Now create something great!
|
*/

Route::get('/', function () {
    return view('welcome');
});
Route::resource('users', TurnstileController::class)->only(['store']);
Cuối cùng, chúng ta hãy mở welcome.php nằm trong thư mục resources\views và chỉnh sửa như sau:
<!DOCTYPE html>
<html lang="en">
<head>
    <title>Cloudflare's Turnstile CAPTCHA in Laravel</title>
    <meta charset="utf-8">
    <meta name="viewport" content="width=device-width, initial-scale=1">
    <link href="https://cdn.jsdelivr.net/npm/[email protected]/dist/css/bootstrap.min.css" rel="stylesheet">
    <script src="https://cdn.jsdelivr.net/npm/[email protected]/dist/js/bootstrap.bundle.min.js"></script>
</head>
<body>
    <div class="jumbotron-custom">
        <div class="container text-center">
            <a href="">
                <img src="https://manhdandev.com/web/img/logo.webp" alt="ManhDanBlogs" height="150">
            </a>
            <h1>Cloudflare's Turnstile CAPTCHA in Laravel</h1>
        </div>
    </div>
    <div class="container mt-3">
        <form action="{{ route('users.store') }}" method="POST">
            @csrf
            <div class="mb-3 mt-3">
                <label for="name">Name:</label>
                <input type="name" class="form-control" id="name" placeholder="Enter name" name="name">
                @error('name')
                    <p class="text-danger">{{ $message }}</p>
                @enderror
            </div>
            <div class="mb-3 mt-3">
                <label for="email">Email:</label>
                <input type="email" class="form-control" id="email" placeholder="Enter email" name="email">
                @error('email')
                    <p class="text-danger">{{ $message }}</p>
                @enderror
            </div>
            <div class="mb-3">
                <label for="password">Password:</label>
                <input type="password" class="form-control" id="password" placeholder="Enter password" name="password">
                @error('password')
                    <p class="text-danger">{{ $message }}</p>
                @enderror
            </div>
            <button type="submit" class="btn btn-primary">Submit</button>
        </form>
    </div>
</body>
</html>
Đăng kí Turnstile CAPTCHA trên Cloudflare
Đầu tiên, bạn phải tạo tài khoản Cloudflare tại đây.
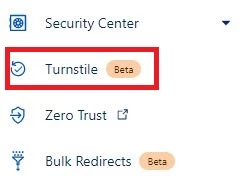
Bước 1: Sau khi tạo khoản cloudflare, bạn hãy đăng nhập và chọn mục "Turnstile" như sau:
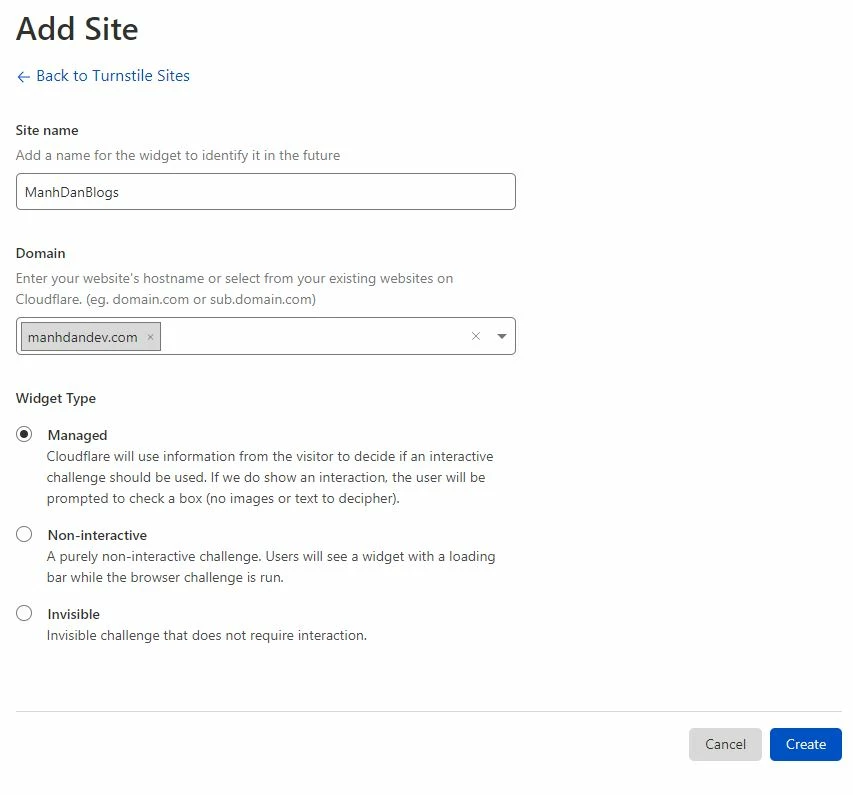
Bước 2: Nhấn nút "Add Site" và điền thông tin tương tự như sau:
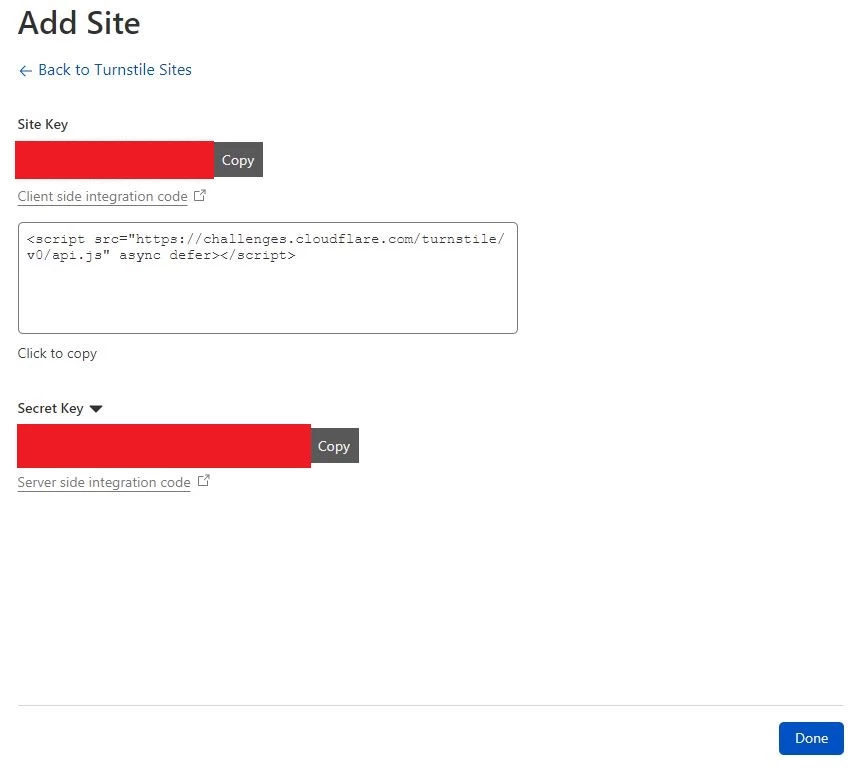
Bước 3: Nhấn nút "Create" để nhận Site Key và Secret Key:
Triển khai Turnstile CAPTCHA trong dự án Laravel
Sau khi có thông tin Site Key và Secret Key, chúng ta hãy thêm thông tin đó vào .env của Laravel như sau:
TURNSTILE_SITE_KEY=xxxxxxxx
TURNSTILE_SECRET_KEY=xxxxxxxx
Bạn hãy mở services.php nằm trong thư mục configs và thêm đoạn mã nguồn sau:
'turnstile' => [
    'site' => env('TURNSTILE_SITE_KEY'),
    'secret' => env('TURNSTILE_SECRET_KEY'),
],
Tiếp theo, chúng sẽ tạo một custom rule để kiểm tra response có hợp lệ hay không, bằng cách sử dụng lệnh sau:
php artisan make:rule TurnstileSau khi khởi tạo custom rule xong, bạn hãy mở Turnstile.php và thêm mã nguồn xử lý như sau:
<?php

namespace App\Rules;

use Illuminate\Contracts\Validation\Rule;
use Illuminate\Support\Facades\Http;

class Turnstile implements Rule
{
    /**
     * Create a new rule instance.
     *
     * @return void
     */
    public function __construct()
    {

    }

    /**
     * Determine if the validation rule passes.
     *
     * @param  string  $attribute
     * @param  mixed  $value
     * @return bool
     */
    public function passes($attribute, $value)
    {
        $response = Http::withHeaders([
            'Accept' => 'application/json',
        ])->asForm()->post('https://challenges.cloudflare.com/turnstile/v0/siteverify', [
            'secret'   => config('services.turnstile.secret'),
            'response' => $value,
            'remoteip' => $this->getIpClient()
        ]);
        $outcome = $response->json();
        return $outcome['success'] ?? false;
    }

     /**
     * Get the IP Client.
     *
     * @return string
     */
    private function getIpClient() {
        foreach (array('HTTP_CLIENT_IP', 'HTTP_X_FORWARDED_FOR', 'HTTP_X_FORWARDED', 'HTTP_X_CLUSTER_CLIENT_IP', 'HTTP_FORWARDED_FOR', 'HTTP_FORWARDED', 'REMOTE_ADDR') as $key) {
            if (array_key_exists($key, $_SERVER) === true){
                foreach (explode(',', $_SERVER[$key]) as $ip){
                    $ip = trim($ip);
                    if (filter_var($ip, FILTER_VALIDATE_IP, FILTER_FLAG_NO_PRIV_RANGE | FILTER_FLAG_NO_RES_RANGE) !== false) {
                        return $ip;
                    }
                }
            }
        }
        return request()->ip();
    }

    /**
     * Get the validation error message.
     *
     * @return string
     */
    public function message()
    {
       return 'Our system recognizes you as a Robot.';
    }
}
Khi xây dựng custom rule Turnstile.php hoàn chỉnh, chúng ta sẽ thêm nó vào validation của TurnstileController.php như sau:
<?php

namespace App\Http\Controllers;

...
use App\Rules\Turnstile;

class TurnstileController extends Controller
{
    /**
     * Store a newly created resource in storage.
     *
     * @param  \Illuminate\Http\Request  $request
     * @return \Illuminate\Http\Response
     */
    public function store(Request $request)
    {
        $validated = $request->validate([
            ...
            'cf-turnstile-response' => ['required', new Turnstile()]
        ]);
        //
    }
}
Cuối cùng,chúng ta sẽ thêm các mã nguồn để tạo response của Turnstile vào welcome.php nằm trong thư mục resources\views như sau:
<!DOCTYPE html>
<html lang="en">
...
<body>
...
<div class="container mt-3">
<form action="{{ route('users.store') }}" method="POST">
@csrf
...
<div class="cf-turnstile text-center" data-sitekey="{{ config('services.turnstile.site') }}"></div>
<button type="submit" class="btn btn-primary">Submit</button>
</form>
</div>
<script src="https://challenges.cloudflare.com/turnstile/v0/api.js" async defer></script>
</body>
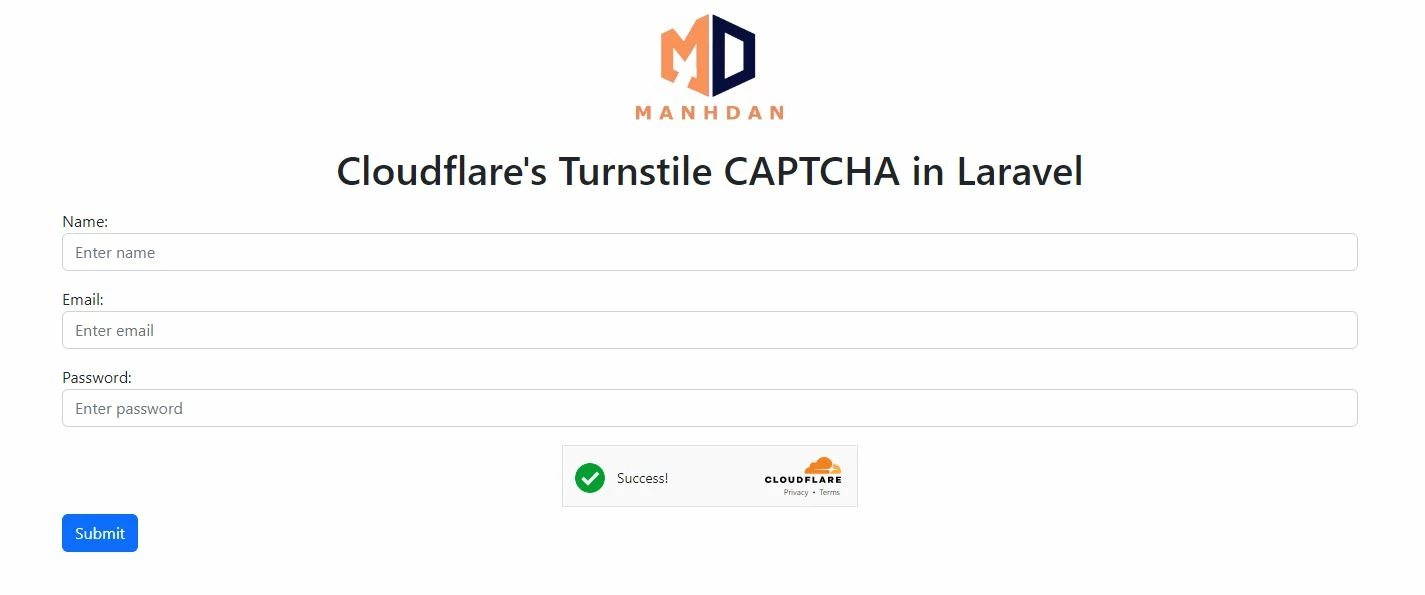
</html>Trải nghiệm Turnstile CAPTCHA trong Laravel
Bạn hãy truy cập vào trang http://127.0.0.1:8000
Để trải nghiệm Turnstile CAPTCHA trong dự án Laravel của mình nào 🌈☀️🌙⭐️🌖🦝
Tài liệu tham khảo:
https://blog.cloudflare.com/turnstile-private-captcha-alternative/