

Hôm nay, trong bài viết này mình sẽ chia sẻ với các bạn cách dompdf mà header và footer sẽ được hiển thị ở tất cả các trang. Đây cũng là một vấn đề khá phổ biến, khi chúng ta phát triển các tính năng liên quan đến file PDF.
Còn chần chừ gì nữa, các bạn hãy theo chân mình, chúng ta sẽ thực hiện điều đó ngay bây giờ nào.
Cài đặt project Laravel
Trong bước đầu tiên này, nếu bạn chưa có project Laravel, thì bạn hãy chạy lệnh bên dưới, ngược lại thì bạn có thể bỏ qua bước này:
composer create-project --prefer-dist laravel/laravel dompdfCài đặt package Dompdf
Trước hết, chúng ta sẽ cài đặt thư viện barryvdh/laravel-dompdf vào project Laravel bằng lệnh sau:
composer require barryvdh/laravel-dompdfSau khi cài đặt thư viện thành công, bạn hãy mở file config/app.php và thêm service provider và alias như sau:
'providers' => [
    ...
    Barryvdh\DomPDF\ServiceProvider::class,

],

'aliases' => Facade::defaultAliases()->merge([
    ...
    'PDF' => Barryvdh\DomPDF\Facade::class,

])->toArray(),
Cấu hình mặc định được đặt trong config/dompdf.php,sao chép file này vào thư mục cấu hình của Laravel để chúng ta dễ dàng sửa đổi các giá trị bằng lệnh sau:
php artisan vendor:publish --provider="Barryvdh\DomPDF\ServiceProvider"Cấu trúc thư mục và tạo các blade view cần thiết
Tiếp theo, chúng ta vào thư mục resources/views và tạo cấu trúc thư mục như sau:
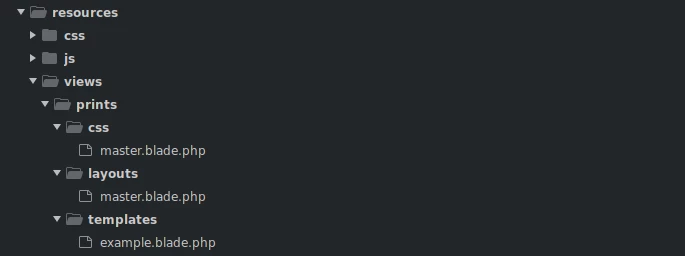
Trong thư mục prints/css, bạn hãy mở file master.blade.php và chỉnh sửa nội dung như sau:
@page {
    margin: 100px 25px;
}

header {
    position: fixed;
    top: -60px;
    left: 0px;
    right: 0px;
    height: 50px;
    font-size: 20px !important;

    /** Extra personal styles **/
    background-color: #fb925a;
    color: white;
    text-align: center;
    line-height: 35px;
}

footer {
    position: fixed;
    bottom: -60px;
    left: 0px;
    right: 0px;
    height: 50px;
    font-size: 20px !important;

    /** Extra personal styles **/
    background-color: #fb925a;
    color: white;
    text-align: center;
    line-height: 35px;
}

.page-break {
    page-break-after: always;
}
Trong thư mục prints/layouts, bạn hãy mở file master.blade.php và chỉnh sửa nội dung như sau:
<html lang="{{ str_replace('_', '-', app()->getLocale()) }}">
    <head>
        <meta http-equiv="Content-Type" content="text/html; charset=utf-8"/>
        <title>{{$title ?? ''}}</title>
        <style>
            @include('prints.css.master')
            @yield('css')
        </style>
    </head>
    <body>
        <!-- Define header and footer blocks before your content -->
        <header>
            @yield('header')
        </header>

        <footer>
            @yield('footer')
        </footer>

        <!-- Wrap the content of your PDF inside a main tag -->
        <main>
            @yield('main')
        </main>

        @yield('script')
    </body>
</html>
Trong thư mục prints/templates, bạn hãy mở file example.blade.php và chỉnh sửa nội dung như sau:
@extends('prints.layouts.master', ['title' => $data['title'] ?? ''])

@section('css')
.content {
    color: red;
}
@endsection

@section('header')
    {{$data['title'] ?? ''}}
@endsection

@section('main')
    <p class="content">
        Lorem ipsum dolor sit amet, consectetur adipisicing elit, sed do eiusmod
        tempor incididunt ut labore et dolore magna aliqua. Ut enim ad minim veniam,
        quis nostrud exercitation ullamco laboris nisi ut aliquip ex ea commodo
        consequat. Duis aute irure dolor in reprehenderit in voluptate velit esse
        cillum dolore eu fugiat nulla pariatur. Excepteur sint occaecat cupidatat non
        proident, sunt in culpa qui officia deserunt mollit anim id est laborum.
    </p>
    <div class="page-break"></div>
    <p>
        Lorem ipsum dolor sit amet, consectetur adipisicing elit, sed do eiusmod
        tempor incididunt ut labore et dolore magna aliqua. Ut enim ad minim veniam,
        quis nostrud exercitation ullamco laboris nisi ut aliquip ex ea commodo
        consequat. Duis aute irure dolor in reprehenderit in voluptate velit esse
        cillum dolore eu fugiat nulla pariatur. Excepteur sint occaecat cupidatat non
        proident, sunt in culpa qui officia deserunt mollit anim id est laborum.
    </p>
@endsection

@section('footer')
    Copyright © <?php echo date("Y");?>
@endsection

@section('script')
    <script type="text/php">
        if ( isset($pdf) ) {
            $font = $fontMetrics->get_font("helvetica", "bold");
            $size = 9;
            $y    = $pdf->get_height() - 24;
            $x    = $pdf->get_width() - 24 - $fontMetrics->get_text_width('1/1', $font, $size);
            $pdf->page_text($x, $y, '{PAGE_NUM}/{PAGE_COUNT}', $font, $size);
        }
    </script>
@endsection
Tạo Controller
Trong bước này, chúng ta sẽ tạo một controller. Các bạn hãy sử dụng lệnh dưới đây để tạo controller:
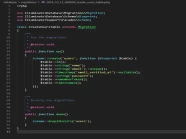
php artisan make:controller PDFControllerTiếp theo, hãy mở file PDFController.php và chỉnh sửa nội dung như sau:
<?php

namespace App\Http\Controllers;

use Illuminate\Http\Request;
use PDF;

class PDFController extends Controller
{
    /**
     * Write Your Code..
     *
     * @return string
    */
    public function generatePDF()
    {
        $data = [
            'title' => 'Welcome to ManhDan Blogs',
            'date'  => date('m/d/Y'),
        ];
        $pdf = PDF::loadView('prints.templates.example', compact('data'));

        if (request()->stream) {
            return $pdf->stream();
        }

        return $pdf->download('example.pdf');

    }
}
Tạo route
Trong bước này, bạn mở file routes/web.php và chỉnh sửa nội dung như sau:
<?php

use Illuminate\Support\Facades\Route;
use App\Http\Controllers\PDFController;

/*
|--------------------------------------------------------------------------
| Web Routes
|--------------------------------------------------------------------------
|
| Here is where you can register web routes for your application. These
| routes are loaded by the RouteServiceProvider within a group which
| contains the "web" middleware group. Now create something great!
|
*/

Route::get('/', function () {
    return view('welcome');
});

Route::get('generate-pdf', [PDFController::class, 'generatePDF']);
Trải nghiệm Dompdf có Header and Footer on every page
Sau khi thực hiện xong các bước phía trên, chúng ta cùng nhau xem lại thành quả xong một chặng đường không quá dài nào.
Nếu bạn muốn download filde PDF, bạn hãy truy cập vào trang bên dưới:
http://127.0.0.1:8000/generate-pdfNếu bạn muốn xem nội dung trước khi download, bạn hãy truy cập vào trang bên dưới:
http://127.0.0.1:8000/generate-pdf?stream=1Kết quả:
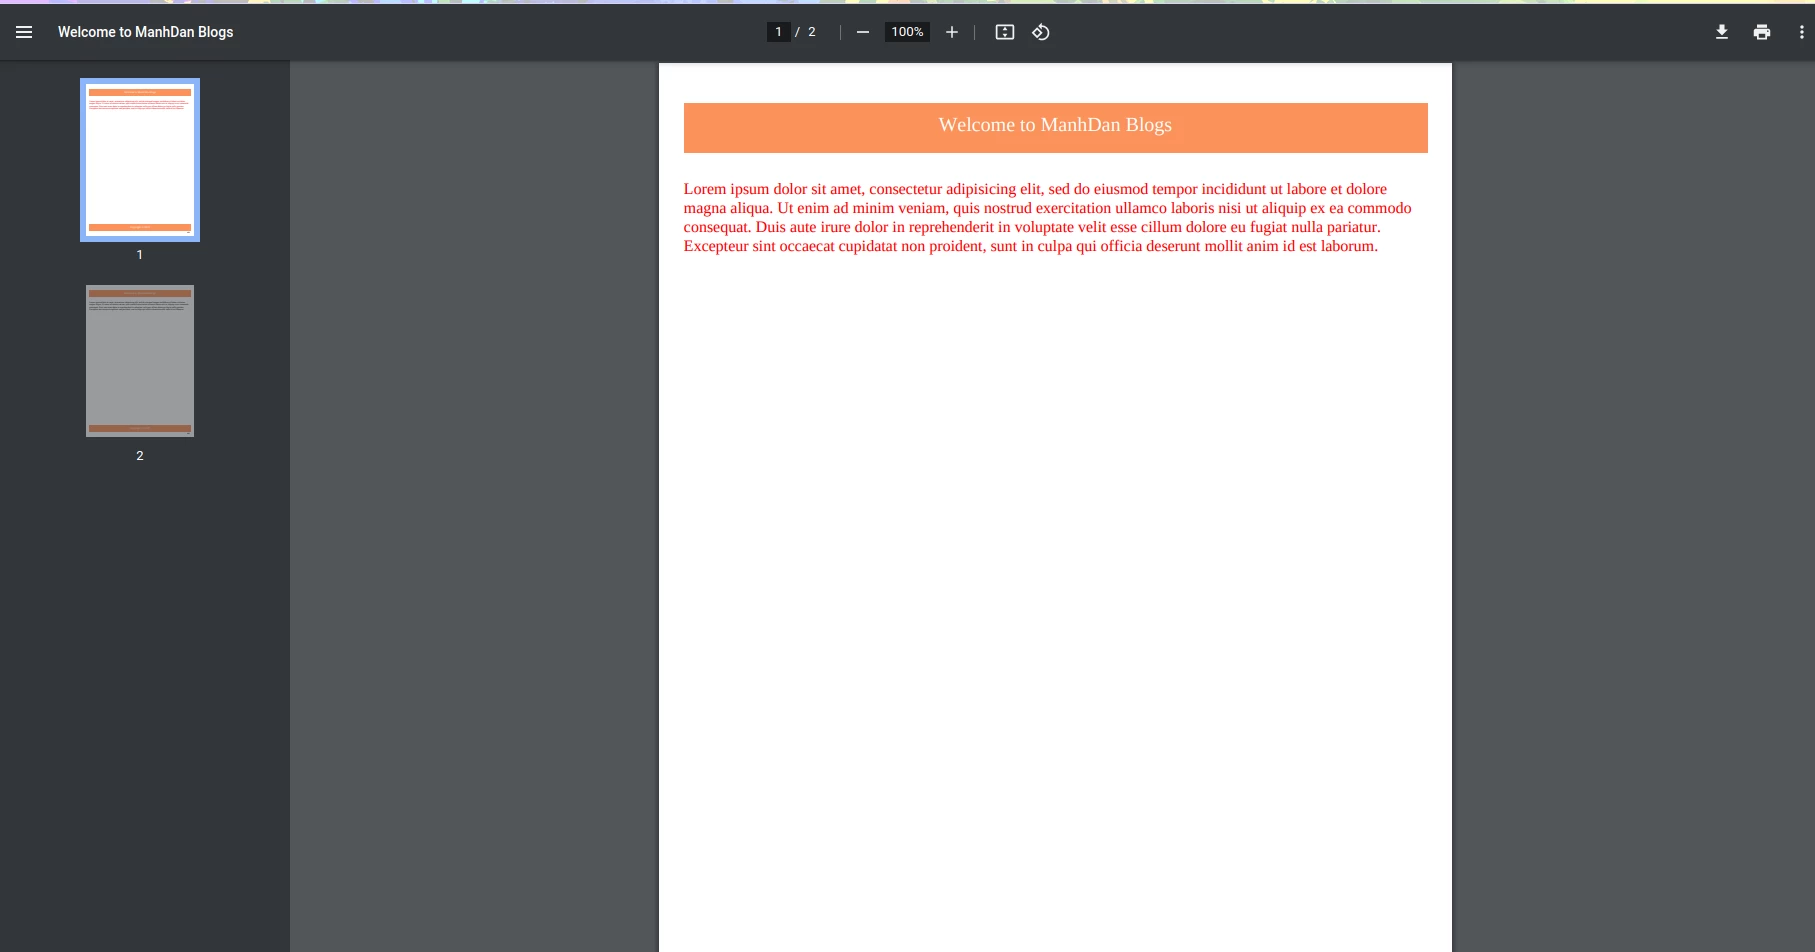
Tới đây, thì chúng ta đã thực xong chức năng dompdf có header và footer được hiển thị ở tất cả các trang, mình hy vọng bài viết sẽ giúp cho công việc của các bạn thuận lợi.
Nếu mọi người muốn góp ý cho bài viết này hoàn thiện hơn, bạn có thể liên lạc với mình qua trang contact.
Hy vọng, chúng ta sẽ gặp lại nhau trong bài viết tiếp theo. Cảm ơn bạn.