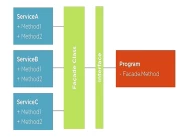
Trong một bài viết lúc trước, mình đã chia sẻ đến các bạn cách xây dựng một service import và export CSV sử dụng Facades, nếu có bạn nào không biết hoặc đã quên các bạn có thể tham khảo lại bài viết tại đây.
Nhưng bài viết đó, chức năng import CSV mình đã chưa đề cập đến validation dữ liệu trước khi lưu xuống database. Vì vậy, hôm nay mình sẽ hướng dẫn các bạn thực hiện điều đó trong bài viết này.
Xây dựng chức năng Import CSV
Đầu tiên, các bạn phải đảm bảo đã xây dựng service import và export CSV sử dụng Facades trong bài viết sau:
https://manhdandev.com/laravel-export-import-csv.html
Tiếp theo, tạo một thư mục tên là Imports trong thư mục app (tức là app/Imports) trong project Laravel của bạn.
Bên trong thư mục này, bạn hãy tạo một file PHP có tên là UsersImport.php. Bạn hãy mở file và chỉnh sửa như sau:
<?php

namespace App\Imports;

use Csv;
use ZipArchive;
use Illuminate\Support\Facades\Validator;

class UsersImport
{
    protected $errors;

    /**
     * Instantiate a new UsersImport instance.
     */
    public function __construct()
    {
        $this->errors = [];
    }

    /**
     * Import data from csv.
     *
     * @param string $file
     */
    public function import(string $file)
    {
        $users = Csv::readWithoutCallBack($file);
        foreach ($users as $user) {
            try {
                if (!empty($errors = $this->validate($user))) {
                    $user['errors'] = $this->getErrorText($errors);
                    $this->errors[] = $user;
                    continue;
                }

                // Keep up with developers

            } catch (\Throwable $th) {
                report($th);
                $user['errors'] = $th->getMessage . ' Line ' . $th->getLine();
                $this->errors[] = $user;
            }
        }

        // Keep up with developers

        unlink($file);
    }

    /**
     * Get the validation rules that apply to the request.
     *
     * @return array
     */
    public function rules()
    {
        $rules = [

        ];

        return $rules;
    }


    /**
     * Return message if nescesary
     *
     * @return array
     */
    public function messages()
    {
        $messages = [

        ];

        return $messages;
    }

    /**
     * Write data import failed to csv.
     *
     * @param array $path
     *
     * @return string
     */
    public function exportCsvFailures(string $path)
    {
        $file    = Csv::create($path);
        $headers = [
            'name',
            'email',
            'password',
            'errors',
        ];
        Csv::write($file, $headers);
        foreach ($this->errors as $error) {
            Csv::write($file, $error);
        }
        return $file;
    }

    /**
     * Compress one or more files to a zip file.
     *
     * @param array $files
     * @param string $path
     *
     * @return array
     */
    public function zip(array $files = [], string $path)
    {
        $zip     = new ZipArchive;
        $succeed = 0;

        if ($zip->open($path, ZipArchive::CREATE) === TRUE) {
            foreach ($files as $file) {
                if (!empty($file)) {
                    $succeed = 1;
                    $zip->addFile($file, basename($file));
                }
            }
            $zip->close();
        }

        foreach ($files as $file) {
            unlink($file);
        }

        if ($succeed) {
            return $path;
        }

        return '';
    }

    /**
     * Make validate a new data import.
     *
     * @param array $data
     *
     * @return array
     */
    public function validate(array $data = [])
    {
        $errors    = [];
        $validator = Validator::make($data, $this->rules(), $this->messages());

        if ($validator->fails()) {
            $errors = $validator->errors()->messages();
        };
        return $errors;
    }

     /**
     * Return message if nescesary
     *
     * @param array $messages
     *
     * @return string
     */
    public function getErrorText(array $messages)
    {
        $messages = array_map(function($message) {
            return $message[0];
        }, $messages);

        return implode(' | ',$messages);
    }

    /**
     * Get the data import failed.
     *
     * @return collection
     */
    public function failures()
    {
        return collect($this->errors);
    }

     /**
     * Download data import failed or empty.
     *
     * @param string $file
     *
     * @return \Symfony\Component\HttpFoundation\Response
     */
    public function download(string $file)
    {
        $headers = [
            "Content-type"  => 'text/csv',
            "Pragma"        => "no-cache",
            "Cache-Control" => "must-revalidate, post-check=0, pre-check=0",
            "Expires"       => "0"
        ];
        return response()->download($file, basename($file), $headers)->deleteFileAfterSend(true);
    }
}
Sau đây, mình sẽ giải thích nhiệm vụ của các phương thức chính trong UsersImport.php để các bạn có thể dễ dàng sử dụng nó trong dự án của bạn.
Import data from CSV
Khi bạn cần đọc dữ liệu từ CSV để import vào cơ sở dữ liệu, bạn có thể sử dụng phương thức import bên dưới.
Nhưng bạn cần thêm đoạn mã nguồn xử lý dữ hợp lệ của bạn xuống database.
/**
 * Import data from csv.
 *
 * @param string $file
 */
public function import(string $file)
{
    $users = Csv::readWithoutCallBack($file);
    foreach ($users as $user) {
        try {
            if (!empty($errors = $this->validate($user))) {
                $user['errors'] = $this->getErrorText($errors);
                $this->errors[] = $user;
                continue;
            }

            // Keep up with developers

        } catch (\Throwable $th) {
            report($th);
            $user['errors'] = $th->getMessage . ' Line ' . $th->getLine();
            $this->errors[] = $user;
        }
    }

    // Keep up with developers

    unlink($file);
}
Row Validation
Khi bạn có thể muốn validate từng dòng dữ liệu trước khi nó được đưa vào cơ sở dữ liệu. Bạn hãy sử dụng phương thức rules, phương thức này sẽ chứa một mảng các Laravel Validation rules sẽ được trả về.
/**
 * Get the validation rules that apply to the request.
 *
 * @return array
 */
public function rules()
{
    $rules = [
        'name' => 'required'
    ];

    return $rules;
}
Custom Validation Messages
Bạn có thể tùy chỉnh các message cho từng rule, bằng cách sử dụng phương thức messages bên dưới:
/**
 * Return message if nescesary
 *
 * @return array
 */
public function messages()
{
    $messages = [
        "*.required" => "The :attribute field is required.",
    ];

    return $messages;
}
Export CSV Failures
Khi muốn xuất csv những dòng dữ liệu không vượt qua được validation, bạn hãy sử dụng phương thức exportCsvFailures bên dưới:
/**
 * Write data import failed to csv.
 *
 * @param array $path
 *
 * @return string
 */
public function exportCsvFailures(string $path)
{
    $file    = Csv::create($path);
    $headers = [
        'name',
        'email',
        'password',
        'errors',
    ];
    Csv::write($file, $headers);
    foreach ($this->errors as $error) {
        Csv::write($file, $error);
    }
    return $file;
}
Zip File
Bạn có thể zip các file CSV lại, bằng cách sử dụng phương thức zip bên dưới:
/**
 * Compress one or more files to a zip file.
 *
 * @param array $files
 * @param string $path
 *
 * @return array
 */
public function zip(array $files = [], string $path)
{
    $zip       = new ZipArchive;
    $succeed   = 0;

    if ($zip->open($path, ZipArchive::CREATE) === TRUE) {
        foreach ($files as $file) {
            if (!empty($file)) {
                $succeed = 1;
                $zip->addFile($file, basename($file));
            }
        }
        $zip->close();
    }

    foreach ($files as $file) {
        unlink($file);
    }

    if ($succeed) {
        return $path;
    }

    return '';
}
Download File
Khi bạn muốn download file csv chứa các dữ liệu không vượt qua được validation, bằng cách sử dụng phương thức download bên dưới:
/**
 * Download data import failed or empty.
 *
 * @param string $file
 *
 * @return \Symfony\Component\HttpFoundation\Response
 */
public function download(string $file)
{
    $headers = [
        "Content-type"  => 'text/csv',
        "Pragma"        => "no-cache",
        "Cache-Control" => "must-revalidate, post-check=0, pre-check=0",
        "Expires"       => "0"
    ];
    return response()->download($file, basename($file), $headers)->deleteFileAfterSend(true);
}
Sử dụng chức năng Import CSV
Sau khi bạn đã thực hiện xong các bước xây dựng chức năng import CSV, hãy tạo một controller để sử dụng nó, bạn hãy sử dụng lệnh sau:
php artisan make:controller UsersImportControllerSau khi chạy lệnh trên, bạn hãy chỉnh sửa UsersImportController.php như sau:
<?php

namespace App\Http\Controllers;

use App\Imports\UsersImport;
use Illuminate\Http\Request;

class UsersImportController extends Controller
{
    public function index(Request $request)
    {
        $file     = public_path('demo.csv');
        // Khởi tạo class UsersImpor
        $import   = new UsersImport;
        // Đọc file csv cần import và xử lý dữ liệu xuống database
        $import->import($file);
        // Kiểm tra xem có row nào import bị lỗi hay không?
        $errorsCsv = '';
        if($import->failures()->isNotEmpty()){
            // Ghi danh sách errors ra csv.
            $errorsCsv = $import->exportCsvFailures('errors.csv');
        }
        // Zip danh sách file csv cần download
        $zip = $import->zip([$errorsCsv], public_path('demo.zip'));
        // Download file zip csv
        if (!empty($zip)) {
            return $import->download($zip);
        }
    }
}
Tới đây, thì chúng ta đã thực xong chức năng validation dữ liệu trước khi lưu xuống database khi import từ file csv, tôi hy vọng bài viết sẽ giúp cho công việc của các bạn thuận lợi.
Nếu mọi người muốn góp ý cho bài viết này hoàn thiện hơn, bạn có thể liên lạc với mình qua trang contact.
Hy vọng, chúng ta sẽ gặp lại nhau trong bài viết tiếp theo. Cảm ơn bạn.

