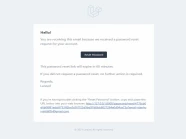
Nếu bạn đang dùng thư viện laravel/ui để làm các chức năng liên quan đến authentication, và trong dự án của bạn, bạn cần thay đổi template email verification thay vì sử dụng template email verification mặc định của của laravel/ui. Vì vậy bài viết này, tôi sẽ hướng dẫn các bạn cách thay đổi template email verification mặc định.

Đầu tiên, bạn hãy mở file User.php nằm trong thư mục app\Models và override function sendEmailVerificationNotification như sau:

<?php

namespace App\Models;

...
use App\Notifications\VerifyEmailNotification;

class User extends Authenticatable implements MustVerifyEmail
{
    ...

    public function sendEmailVerificationNotification()
    {
        $this->notify(new VerifyEmailNotification());
    }
}

Tiếp theo, chúng ta sẽ tạo ra một notification có tên là VerifyEmailNotification.php bằng lệnh command sau:

php artisan make:notification VerifyEmailNotification

Sau đó, bạn hãy mở file VerifyEmailNotification.php nằm trong thư mục app\Notifications và chỉnh sửa như sau:

<?php

namespace App\Notifications;

use Illuminate\Bus\Queueable;
use Illuminate\Contracts\Queue\ShouldQueue;
use Illuminate\Notifications\Messages\MailMessage;
use Illuminate\Notifications\Notification;
use Illuminate\Auth\Notifications\VerifyEmail as VerifyEmailBase;

class VerifyEmailNotification extends VerifyEmailBase
{
    use Queueable;

    /**
     * Create a new notification instance.
     *
     * @return void
     */
    public function __construct()
    {
        //
    }

    /**
     * Get the notification's delivery channels.
     *
     * @param  mixed  $notifiable
     * @return array
     */
    public function via($notifiable)
    {
        return ['mail'];
    }

    /**
     * Get the mail representation of the notification.
     *
     * @param  mixed  $notifiable
     * @return \Illuminate\Notifications\Messages\MailMessage
     */
    public function toMail($notifiable)
    {
        $verificationUrl = $this->verificationUrl($notifiable);
        return (new MailMessage)->view('emails.users.verify', ['url' => $verificationUrl]);
    }

    /**
     * Get the array representation of the notification.
     *
     * @param  mixed  $notifiable
     * @return array
     */
    public function toArray($notifiable)
    {
        return [
            //
        ];
    }
}

Cuối cùng, bạn hãy tạo file verify.blade.php nằm trong thư mục resources\views\emails\users và có nội dung như sau:

ManhDanBlog Laravel UI Custom Email Verification Template <br>
URL: {{ $url }}

Đây là chính là nội dung template email verification mới, bạn có thể thay đổi nội dung để phù hợp với dự án của bạn.

Như vậy là chúng ta đã làm xong việc thay đổi template email verification mặc định rồi. Tôi hy vọng bạn thích hướng dẫn này. Nếu bạn có bất kỳ câu hỏi nào hãy liên hệ với chúng tôi qua trang contact. Cảm ơn bạn.

CÓ THỂ BẠN QUAN TÂM

ZSH-Artisan CLI and Docker: The Perfect Match for Laravel Development

ZSH-Artisan CLI and Docker: The Perfect Match for Laravel Development

Zsh Zsh viết tắt của “ Z Shell ” là một shell nâng cao cho hệ thống Unix và Linux. Nó được phát triển nhằm cung cấp các tính năng và khả năng cao hơn so với shell mặc định trên hầu hết các hệ thố...

Laravel Socialite Login With Google

Laravel Socialite Login With Google

Google Google là một công cụ tìm kiếm trên internet. Nó sử dụng một thuật toán độc quyền được thiết kế để truy xuất và sắp xếp các kết quả tìm kiếm nhằm cung cấp các nguồn dữ liệu đáng tin cậy và ph...

Integrating elFinder into TinyMCE 6 in Laravel

Integrating elFinder into TinyMCE 6 in Laravel

TinyMCE TinyMCE là một trình soạn thảo WYSIWYG được xây dựng trên nền tảng Javascript, được phát triển dưới dạng mã nguồn mở theo giấy phép MIT bởi Tiny Technologies Inc. TinyMCE cho phép người d...

How to Install Laravel on CentOS 6/7

How to Install Laravel on CentOS 6/7

Laravel là một PHP Framework mã nguồn mở miễn phí, được phát triển bởi Taylor Otwell với phiên bản đầu tiên được ra mắt vào 6/2011. Laravel ra đời nhằm mục đích phát triển ứng dụng web dựa trên mô hìn...

Export CSV from SQL Server - Import into MySQL with Laravel

Export CSV from SQL Server - Import into MySQL with Laravel

Transfer Database Trong quá trình phát triển và bảo trì dự án, việc di chuyển cơ sở dữ liệu từ hệ thống này sang hệ thống khác là một nhiệm vụ khá phổ biến. Giả sử bạn cần di chuyển dữ liệu từ SQ...

Export CSV from AWS RDS - Import into MySQL with Laravel

Export CSV from AWS RDS - Import into MySQL with Laravel

Transfer Database Trong quá trình phát triển và bảo trì dự án, nhiệm vụ di chuyển cơ sở dữ liệu từ hệ thống này sang hệ thống khác là một nhiệm vụ khá là phổ biến. Chúng ta thường sẽ sử dụng câu...

How to insert into a database at lightning speed?

How to insert into a database at lightning speed?

Trong quá trình thực hiện dự án cho công ty, một trong những yêu cầu đặt ra là import dữ liệu từ file CSV (chứa dữ liệu từ hệ thống cũ) vào cơ sở dữ liệu MySQL của hệ thống mới. Do sự thay đổi cấu...

Integrating Google Gemini AI in Laravel

Integrating Google Gemini AI in Laravel

Google Gemini Gemini là một mô hình trí tuệ nhân tạo mới mạnh mẽ từ Google không chỉ có khả năng hiểu văn bản mà còn có thể hiểu cả hình ảnh, video và âm thanh. Gemini là một mô hình đa phương ti...

Document Laravel API With OpenAPI (Swagger)

Document Laravel API With OpenAPI (Swagger)

Swagger là gì? Swagger là một Ngôn ngữ mô tả giao diện để mô tả các API RESTful được thể hiện bằng JSON. Swagger được sử dụng cùng với một bộ công cụ phần mềm mã nguồn mở để thiết kế, xây dựng, l...

ManhDanBlogs