

Hiện nay, đa số các dự án đều có chức năng upload file, nên tôi đã thử xây dựng một lớp Trait Upload File, để chúng ta dễ dàng sao chép qua các dự án khác để sử dụng, nhằm rút ngắn thời gian phát triển chức năng upload file, trong lớp Trait Upload File này tôi sẽ chia nhỏ thành các function khác nhau, từ đó giúp chúng ta ta dễ dàng thực hiện override funtion hơn để phù hợp với dự án hiện tại.
Đầu tiên, chúng ta sẽ tạo thư mục Traits bên trong thư mục app (Tức là app/Traits).
Bên trong thư mục này, chúng ta sẽ tạo một file PHP tên là UploadFileTrait.php. Bạn hãy mở và chỉnh sửa lại như sau:
<?php

namespace App\Traits;

use Throwable;
use Illuminate\Http\Request;
use Illuminate\Http\JsonResponse;
use Illuminate\Http\Exceptions\HttpResponseException;

trait UploadFileTrait
{
    /**
     * Set path root when upload file.
     *
     * @var string
     */
    protected $base_path = 'tmp';

    /**
     * Set path root when upload file.
     *
     * @var string
     */
    protected $base_disk = 'public';

    /**
     * Add file to storage laravel.
     *
     * @param  \Illuminate\Http\Request  $request
     * @return \Illuminate\Http\RedirectResponse|\Illuminate\Http\JsonResponse
     */
    public function addFile(Request $request)
    {
        $this->validateLogin($request);
        // Here we will attempt to upload file the file. If it is successful we
        // will put file to folder temp. Otherwise we will return value false
        $response = $this->storeFileTemp($request, $this->base_path);
        // If the file was successfully upload, we will return successfully response
        // If the file was failure upload, we will return failure response
        return $response == false
                    ? $this->sendUploadFailedResponse($response)
                    : $this->sendUploadResponse($response);
    }

    /**
     * Validate the upload file request.
     *
     * @param  \Illuminate\Http\Request  $request
     * @return void
     *
     * @throws \Illuminate\Validation\ValidationException
     */
    protected function validateLogin(Request $request)
    {
        $request->validate([
            'file' => 'required|file',
        ]);
    }

    /**
     * upload file to folder temp.
     *
     * @param  string  $file
     * @param  string  $path
     * @return string
     */
    public function storeFileTemp(Request $request, $path)
    {
        try {
            $original_name      = $request->file->getClientOriginalName();
            $original_extension = $request->file->getClientOriginalExtension();
            $name               = basename($original_name, '.' . $original_extension);
            $file_name          = $this->setNameFile($name, $original_extension);
            return $request->file->storeAs($path, $file_name, $this->base_disk);
        } catch (\Throwable $th) {
            report($th);
            return false;
        }
    }

    /**
     * Get the response for a successful password reset.
     *
     * @param  \Illuminate\Http\Request  $request
     * @param  string  $response
     * @return \Illuminate\Http\RedirectResponse|\Illuminate\Http\JsonResponse
     */
    protected function setPresignedRequest($file_path)
    {
        return \Storage::disk($this->base_disk)->url($file_path);
    }

    /**
     * Create new name file.
     *
     * @param  \Illuminate\Http\Request  $request
     * @param  string  $response
     * @return \Illuminate\Http\RedirectResponse|\Illuminate\Http\JsonResponse
     */
    protected function setNameFile($name, $extension)
    {
        $time = time();
        return "{$name}-{$time}.{$extension}";
    }

    /**
     * Get the response for a successful upload file.
     *
     * @param  \Illuminate\Http\Request  $request
     * @param  string  $response
     * @return \Illuminate\Http\RedirectResponse|\Illuminate\Http\JsonResponse
     */
    protected function sendUploadResponse($response)
    {
        $result = [
            'location' => $this->setPresignedRequest($response),
        ];
        return new JsonResponse($result, 200);
    }

    /**
     * Get the response for a failed upload file.
     *
     * @param  \Illuminate\Http\Request  $request
     * @param  string  $response
     * @return \Illuminate\Http\RedirectResponse|\Illuminate\Http\JsonResponse
     */
    protected function sendUploadFailedResponse($response)
    {
        throw new HttpResponseException(
            response()->json([
                    'message' => 'The given data was invalid.',
                    'errors'  => [
                        'file' => 'Cannot upload file.'
                    ]
                ], JsonResponse::HTTP_UNPROCESSABLE_ENTITY)
        );
    }
}
Các bạn thấy không, như vậy là chúng ta đã setting xong lớp Trait Upload File để hỗ trợ chúng ta trong việc xây dựng tính năng upload file của dự án rồi phải không?
Sau đó bạn hãy chạy lệnh command sau(do mình upload trong thư mục storage của laravel):
php artisan storage:link
Để sử dụng được lớp Traits này, chúng ta cần phải có một controller, để tạo ra một controller bạn hãy thực hiện lệnh command sau:
php artisan make:controller UploadControllerSau khi tạo controller xong, bạn hãy mở file và chỉnh sửa lại như sau:
<?php

namespace App\Http\Controllers;

use App\Http\Controllers\Controller;
use Illuminate\Http\Request;
use App\Traits\UploadFileTrait;

class UploadController extends Controller
{
    use UploadFileTrait;
}
Tiếp theo, chúng ta phải tạo ra một view để thực hiện việc upload file, đầu tiên chúng ta sẽ thêm một function nữa ở UploadController, bạn hãy mở file controller và chỉnh sửa như sau:
<?php

namespace App\Http\Controllers;

use App\Http\Controllers\Controller;
use Illuminate\Http\Request;
use App\Traits\UploadFileTrait;

class UploadController extends Controller
{
    use UploadFileTrait;

    public function form(Request $request)
    {
        return view('upload');
    }
}
Tiếp theo, chúng ta sẽ setting các router cần thiết cho việc upload file, bạn hãy mở file routes/web.php và chỉnh sửa như sau:
<?php

use Illuminate\Support\Facades\Route;
use App\Http\Controllers\UploadController;

/*
|--------------------------------------------------------------------------
| Web Routes
|--------------------------------------------------------------------------
|
| Here is where you can register web routes for your application. These
| routes are loaded by the RouteServiceProvider within a group which
| contains the "web" middleware group. Now create something great!
|
*/

Route::group(['as' => 'upload.', 'prefix' => 'upload-file'], function () {
    Route::get('/', [UploadController::class, 'form'])->name('form');
    Route::post('add', [UploadController::class, 'addFile'])->name('add');
});
Sau đó, chúng ta sẽ tạo giao diện để thực hiện việc upload file, bạn hãy tạo file có tên là upload.blade.php nằm ở thư mục resources/view và chỉnh sửa như sau:
<!DOCTYPE html>
<html>
<body>

<p>Click on the "Choose File" button to upload a file:</p>

<form action="{{ route('upload.add')}}" enctype="multipart/form-data" method="POST">
    @csrf
    @if (\Session::has('success'))
        <div class="alert alert-success">
            <ul>
                <li>{!! \Session::get('success') !!}</li>
            </ul>
        </div>
    @endif
    @if ($errors->any())
    <div class="alert alert-danger">
        <ul>
            @foreach ($errors->all() as $error)
            <li>{{ $error }}</li>
            @endforeach
        </ul>
    </div>
    @endif
    <input type="file" id="file" name="file">
    <input type="submit">
</form>

</body>
</html>
Tới đây, chúng ta đã setting xong lớp Trait để hỗ trợ cho việc upload file, các bạn hãy truy cập vào form upload, do mình xài ở local nên mình truy cập như sau:
http://127.0.0.1:8000/upload-file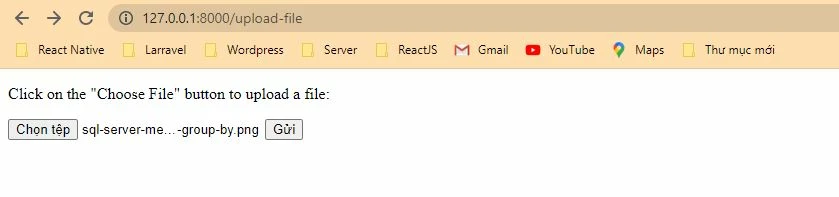
Sau khi, các bạn chọn file và nhấn nút gửi, nếu thành công nó sẽ trả ra kết quả như sau:

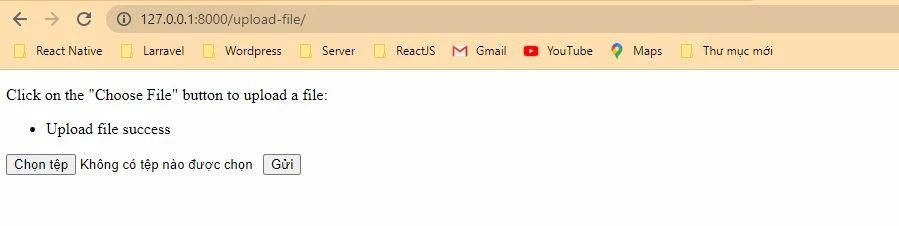
Mặc định, Trait Upload File sẽ trả về kết quả là json, nếu bạn xử lý khác để phù hợp với dự án của bạn chẳng hạn như bạn muốn redirect về form upload kèm theo thông báo thành công chảng hạn, bạn có thể override function sendUploadResponse như sau:
<?php

namespace App\Http\Controllers;

use App\Http\Controllers\Controller;
use Illuminate\Http\Request;
use App\Traits\UploadFileTrait;

class UploadController extends Controller
{
    use UploadFileTrait;

    public function form(Request $request)
    {
        return view('upload');
    }

    protected function sendUploadResponse($response)
    {
         return redirect()->back()->with('success', 'Upload file success');
    }

}
Sau khi chỉnh sửa xong, khi bạn upload thành công sẽ nhận được kết quả như sau:
Ngoài ra, bạn có thể override bất kỳ function nào trong lớp Trait để phù hợp với dự án của các bạn. Tôi hy vọng bạn thích hướng dẫn này. Nếu bạn có bất kỳ câu hỏi nào hãy liên hệ với chúng tôi qua trang contact. Cảm ơn bạn.